With a variety of day-to-day activities that take our time
in front of the computer, which sometimes just to look for entertainment
watching movies or playing games. It's good to add self-creativity and insight
by utilizing the applications that have been available on the computer. One of
them by using a corel draw application to create various designs such as logos.
For Computer Users
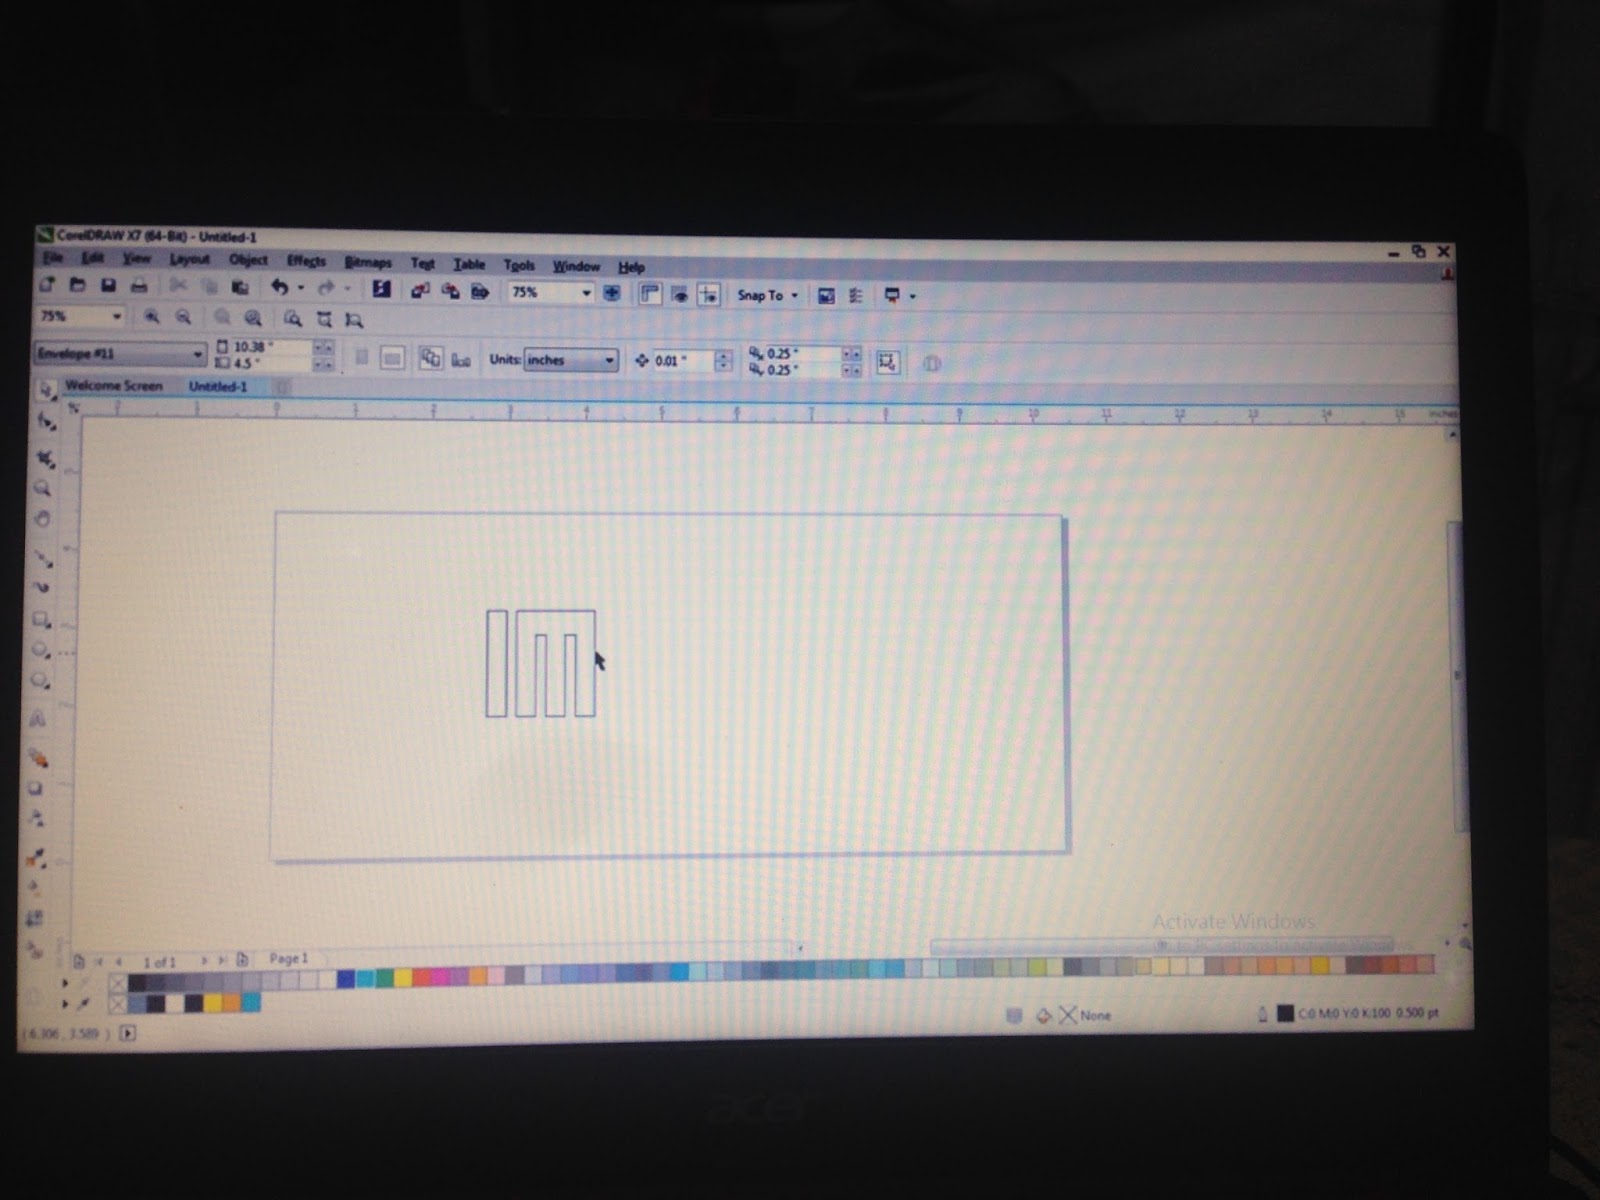
Step 1
Make four boxes arranged approximately like this.

The leftmost box will we make the letter I, the three right boxes later we will make the letter M. Ok then set the position so that the four boxes were flat on the bottom, then the distance of each is also the same, premises how to select all images with pick tool, Then click the Align menu, select align and distribute.
Step 2
Then make a horizontal box, set the size and position like
this.

Next, three boxes to the right and one flat box, you select the four with the pick tool, then click "weld" in the toolbar.
Step 3
Well, look at the result, more or less like this
Step 4
Now have the letters I and M, Copy the letter M and slide to
the right, then rotated 90° to make the number 3

Step 5
After that give white color to all the images that have been
made. Then make a picture of the box that frame the IM3 image before, so if
it's like this

Step 6
Give black color to the big tote we just made. To cover that
all IM3 logo

Step 7
Click on the black box, then press the Shift + Pagedown key
from your keyboard. So the result of the black box is behind.

Now you group everything, select them all using pick tool,
then press Ctrl + G key from keyboard. Then all the images have been digroup
into one. If it is, click once again the image, so that the arrows appear
around the image, make a little italic (italic).

Step 9
Okay now we make a circle, then give the yellow color and
set the hairline to be like the picture below, the goal is to thicken the
circle line

Step 10
Make two more circles with a slightly larger size, so the
result is something like this:

Well, easy and dancing right? Hope can add insight and
creativity of friends by trying other designs. Good luck.
Tidak ada komentar:
Posting Komentar